Table of contents
Preamble
After a first part where we have setup the Kubernetes cluster and added a second node, this second part will be about pods creation with direct download of the image and creation of YAML file to use them later to deploy and, more importantly, modify existing pod.
This second part will mainly focus on setup of useful tools to handle YAML files and creation of stateless pods.
Stateless Nginx web server with a deployment
The suggested stateless application deployment to test your newly installed Kubernetes cluster is a simple Nginx web server though a Kubernetes deployment. Create it simply with below command and wait a few minutes to have it ready (number of replicas is 1 by default):
[root@server1 ~]# kubectl create deployment nginx --image=nginx deployment.apps/nginx created [root@server1 ~]# kubectl get deployment NAME READY UP-TO-DATE AVAILABLE AGE nginx 0/1 1 0 9s [root@server1 ~]# kubectl get deployment NAME READY UP-TO-DATE AVAILABLE AGE nginx 1/1 1 1 104s |
Confirm the pod is running with one replicaset. By default the running node of my Kubernetes cluster is OT the control node (so server2.domain.com in my case):
[root@server1 ~]# kubectl get pod -o wide NAME READY STATUS RESTARTS AGE IP NODE NOMINATED NODE READINESS GATES nginx-6799fc88d8-zn2dm 1/1 Running 0 40s 192.168.55.2 server2.domain.com <none> <none> [root@server1 ~]# kubectl get replicaset NAME DESIRED CURRENT READY AGE nginx-6799fc88d8 1 1 1 6d22h |
Expose the deployment as a service on port 80 and get the port on the k8s cluster of your deployment with:
[root@server1 ~]# kubectl expose deployment nginx --type=NodePort --port=80 service/nginx exposed [root@server1 ~]# kubectl get service nginx NAME TYPE CLUSTER-IP EXTERNAL-IP PORT(S) AGE nginx NodePort 10.105.114.178 <none> 80:32609/TCP 177m |
Then you can control it works with your web browser (accessing my worker IP address i.e. server2.domain.com on port 32609):

To get more information on your newly created service:
[root@server1 ~]# kubectl describe service nginx Name: nginx Namespace: default Labels: app=nginx Annotations: <none> Selector: app=nginx Type: NodePort IP Family Policy: SingleStack IP Families: IPv4 IP: 10.105.114.178 IPs: 10.105.114.178 Port: <unset> 80/TCP TargetPort: 80/TCP NodePort: <unset> 32609/TCP Endpoints: 192.168.55.2:80 Session Affinity: None External Traffic Policy: Cluster Events: <none> [root@server1 ~]# kubectl get ep nginx NAME ENDPOINTS AGE nginx 192.168.55.2:80 46m |
You can also curl inside the container with exec command using the cluster IP address with something like:
[root@server1 ~]# kubectl exec nginx-6799fc88d8-zn2dm -- curl -s http://10.105.114.178 . . . |
Accessing a container from outside the Kubernetes cluster
Even if my network expertise is ridiculous I really wanted to access the pod with its own IP address i.e. 192.168.55.2. For this I have started to modify the routing table on my virtual machines host that is my Windows 10 desktop:
PS C:\WINDOWS\system32> route print =========================================================================== Interface List 6...0a 00 27 00 00 06 ......VirtualBox Host-Only Ethernet Adapter 5...48 0f cf 33 0a 07 ......Intel(R) Ethernet Connection (2) I218-LM 1...........................Software Loopback Interface 1 =========================================================================== IPv4 Route Table =========================================================================== Active Routes: Network Destination Netmask Gateway Interface Metric 0.0.0.0 0.0.0.0 10.70.101.254 10.70.101.129 35 10.70.101.0 255.255.255.0 On-link 10.70.101.129 291 10.70.101.129 255.255.255.255 On-link 10.70.101.129 291 10.70.101.255 255.255.255.255 On-link 10.70.101.129 291 127.0.0.0 255.0.0.0 On-link 127.0.0.1 331 127.0.0.1 255.255.255.255 On-link 127.0.0.1 331 127.255.255.255 255.255.255.255 On-link 127.0.0.1 331 192.168.56.0 255.255.255.0 On-link 192.168.56.1 281 192.168.56.1 255.255.255.255 On-link 192.168.56.1 281 192.168.56.255 255.255.255.255 On-link 192.168.56.1 281 224.0.0.0 240.0.0.0 On-link 127.0.0.1 331 224.0.0.0 240.0.0.0 On-link 10.70.101.129 291 224.0.0.0 240.0.0.0 On-link 192.168.56.1 281 255.255.255.255 255.255.255.255 On-link 127.0.0.1 331 255.255.255.255 255.255.255.255 On-link 10.70.101.129 291 255.255.255.255 255.255.255.255 On-link 192.168.56.1 281 =========================================================================== Persistent Routes: None IPv6 Route Table =========================================================================== Active Routes: If Metric Network Destination Gateway 1 331 ::1/128 On-link 1 331 ff00::/8 On-link =========================================================================== Persistent Routes: None |
With initial configuration any TRACERT.EXE 192.168.55.18 or TRACERT.EXE 192.168.55.1 would end up with something not answering…
So (as administrator), inspired from 192.168.56.0/24 subnet configured by VirtualBox, I have issued the two below commands (that will give a route to 192.168.55.0/24 subnet). I also had to specify the interface to use the VirtualBox one (if option):
PS C:\WINDOWS\system32> route add 192.168.55.0 mask 255.255.255.0 192.168.55.1 if 6 OK! PS C:\WINDOWS\system32> route add 192.168.55.1 mask 255.255.255.255 192.168.56.1 if 6 OK! PS C:\WINDOWS\system32> route add 192.168.55.255 mask 255.255.255.255 192.168.56.1 if 6 OK! |
To remove what you added you can use:
PS C:\WINDOWS\system32> route delete 192.168.55.0 OK! PS C:\WINDOWS\system32> route delete 192.168.55.1 OK! PS C:\WINDOWS\system32> route delete 192.168.55.255 OK! |
To end up with this routing table:
PS C:\Users\yjaquier> route print =========================================================================== Interface List 6...0a 00 27 00 00 06 ......VirtualBox Host-Only Ethernet Adapter 5...48 0f cf 33 0a 07 ......Intel(R) Ethernet Connection (2) I218-LM 1...........................Software Loopback Interface 1 =========================================================================== IPv4 Route Table =========================================================================== Active Routes: Network Destination Netmask Gateway Interface Metric 0.0.0.0 0.0.0.0 10.70.101.254 10.70.101.129 35 10.70.101.0 255.255.255.0 On-link 10.70.101.129 291 10.70.101.129 255.255.255.255 On-link 10.70.101.129 291 10.70.101.255 255.255.255.255 On-link 10.70.101.129 291 127.0.0.0 255.0.0.0 On-link 127.0.0.1 331 127.0.0.1 255.255.255.255 On-link 127.0.0.1 331 127.255.255.255 255.255.255.255 On-link 127.0.0.1 331 192.168.55.0 255.255.255.0 192.168.55.1 192.168.56.1 26 192.168.55.1 255.255.255.255 On-link 192.168.56.1 26 192.168.55.255 255.255.255.255 On-link 192.168.56.1 26 192.168.56.0 255.255.255.0 On-link 192.168.56.1 281 192.168.56.1 255.255.255.255 On-link 192.168.56.1 281 192.168.56.255 255.255.255.255 On-link 192.168.56.1 281 224.0.0.0 240.0.0.0 On-link 127.0.0.1 331 224.0.0.0 240.0.0.0 On-link 192.168.56.1 281 224.0.0.0 240.0.0.0 On-link 10.70.101.129 291 255.255.255.255 255.255.255.255 On-link 127.0.0.1 331 255.255.255.255 255.255.255.255 On-link 192.168.56.1 281 255.255.255.255 255.255.255.255 On-link 10.70.101.129 291 =========================================================================== Persistent Routes: None IPv6 Route Table =========================================================================== Active Routes: If Metric Network Destination Gateway 1 331 ::1/128 On-link 1 331 ff00::/8 On-link =========================================================================== Persistent Routes: None |
This has allowed access to Nginx web server fetching 192.168.55.2 from my desktop. I can also ping the IP address directly from my desktop (so outside of the cluster). I can access the nginx server fron the server (server2.domain.com) running the pod but not from my controller node (server1.domain.com):
[root@server1 ~]# ping -c 1 192.168.55.2 PING 192.168.55.2 (192.168.55.2) 56(84) bytes of data. From 192.168.55.1 icmp_seq=1 Destination Host Unreachable --- 192.168.55.2 ping statistics --- 1 packets transmitted, 0 received, +1 errors, 100% packet loss, time 0ms [root@server1 ~]# curl http://192.168.55.2 curl: (7) Failed to connect to 192.168.55.2 port 80: No route to host [root@server2 ~]# ping -c 1 192.168.55.2 PING 192.168.55.2 (192.168.55.2) 56(84) bytes of data. 64 bytes from 192.168.55.2: icmp_seq=1 ttl=64 time=0.079 ms --- 192.168.55.2 ping statistics --- 1 packets transmitted, 1 received, 0% packet loss, time 0ms rtt min/avg/max/mdev = 0.079/0.079/0.079/0.000 ms [root@server2 ~]# curl 192.168.55.2 . . . |

One option to access from outside the cluster is to enable port forwarding with kubectl port-forward command, so using something like:
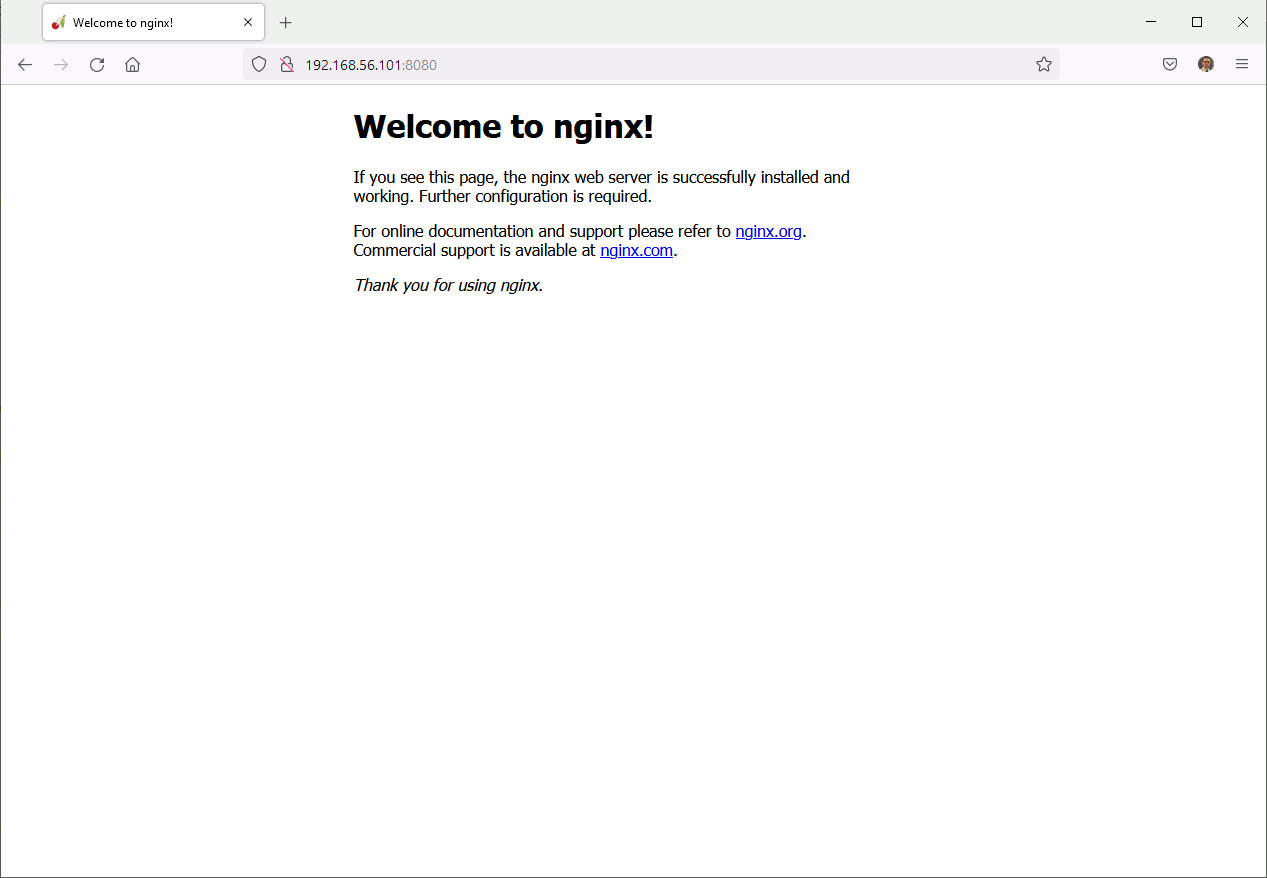
[root@server1 ~]# kubectl get pods -o wide NAME READY STATUS RESTARTS AGE IP NODE NOMINATED NODE READINESS GATES nginx-6799fc88d8-zn2dm 1/1 Running 0 3h36m 192.168.55.2 server2.domain.com <none> <none> [root@server1 ~]# kubectl port-forward pod/nginx-6799fc88d8-zn2dm 8080:80 Forwarding from 127.0.0.1:8080 -> 80 Forwarding from [::1]:8080 -> 80 [root@server1 ~]# kubectl port-forward pod/nginx-6799fc88d8-zn2dm :80 Forwarding from 127.0.0.1:40859 -> 80 Forwarding from [::1]:40859 -> 80 [root@server1 ~]# kubectl port-forward --address 0.0.0.0 pod/nginx-6799fc88d8-zn2dm 8080:80 Forwarding from 0.0.0.0:8080 -> 80 |
With last command on any IP address on controller node (server1.domain.com) and port 8080 I can access to my Nginx server:
Overall this part is not fully clear and I really need to progress on this Kubernetes area…
How to scale a pod with ReplicaSet
For example if I scale my Nginx application to 3 pods:
[root@server1 ~]# kubectl get deployment NAME READY UP-TO-DATE AVAILABLE AGE nginx 1/1 1 1 3d5h [root@server1 ~]# kubectl scale --replicas=3 deployment/nginx deployment.apps/nginx scaled [root@server1 ~]# kubectl get deployment NAME READY UP-TO-DATE AVAILABLE AGE nginx 1/3 3 1 3d5h [root@server1 ~]# kubectl get deployment NAME READY UP-TO-DATE AVAILABLE AGE nginx 3/3 3 3 3d5h [root@server1 ~]# kubectl get pod -o wide NAME READY STATUS RESTARTS AGE IP NODE NOMINATED NODE READINESS GATES nginx-6799fc88d8-g8v2v 1/1 Running 0 20s 192.168.55.4 server2.domain.com <none> <none> nginx-6799fc88d8-zhhsn 1/1 Running 0 20s 192.168.55.5 server2.domain.com <none> <none> nginx-6799fc88d8-zn2dm 1/1 Running 1 (2d23h ago) 3d5h 192.168.55.3 server2.domain.com <none> <none> |
If I delete (or kill) one pod then automatically a new one is created:
[root@server1 ~]# kubectl get pod -o wide NAME READY STATUS RESTARTS AGE IP NODE NOMINATED NODE READINESS GATES nginx-6799fc88d8-g8v2v 1/1 Running 0 6m16s 192.168.55.4 server2.domain.com <none> <none> nginx-6799fc88d8-zhhsn 1/1 Running 0 6m16s 192.168.55.5 server2.domain.com <none> <none> nginx-6799fc88d8-zn2dm 1/1 Running 1 (2d23h ago) 3d5h 192.168.55.3 server2.domain.com <none> <none> [root@server1 ~]# kubectl delete pod nginx-6799fc88d8-zhhsn pod "nginx-6799fc88d8-zhhsn" deleted [root@server1 ~]# kubectl get pod -o wide NAME READY STATUS RESTARTS AGE IP NODE NOMINATED NODE READINESS GATES nginx-6799fc88d8-9pbcf 1/1 Running 0 7s 192.168.55.6 server2.domain.com <none> <none> nginx-6799fc88d8-g8v2v 1/1 Running 0 6m40s 192.168.55.4 server2.domain.com <none> <none> nginx-6799fc88d8-zn2dm 1/1 Running 1 (2d23h ago) 3d5h 192.168.55.3 server2.domain.com <none> <none> |
To see if my pod would also go on my controller node I have authorized pod creation on it because by default it’s forbidden:
[root@server1 ~]# kubectl taint nodes --all node-role.kubernetes.io/master- node/server1.domain.com untainted error: taint "node-role.kubernetes.io/master" not found |
To be honest none of my pods went to my master node and if you dig a bit on Internet you will see that the pod allocation on nodes is a recurreing issue for poeple. To come back to original situation simply do:
[root@server1 ~]# kubectl taint nodes server1.domain.com node-role.kubernetes.io/master=:NoSchedule node/server1.domain.com tainted |
Move pods from one node to another
Once I have added this additional node I wanted to move out from my control node the Nginx pod we have created above. I thought it would be a simple command but I was highly wrong… Currently it is not possible to move on-the-fly pods from one node to another. The only available option is to re-schedule the pod and use node affinity, with labels, to force a pod running on a node.
I’m not yet at this level but I have seen plenty of blog posts of people complaining that in their cluster some nodes are highly used while some others are almost idle and they have no option to solve the situation…
How to sanitize your deployment YAML files
To create a deployment or a pod or to modify existing resources you often create a YAML file of an existing resource. You can also create this YAML file directly from scratch and the official k8s documentation is full of example. One issue I have immediately see is the verbosity of the YAML file generated from an existing resource with a command like:
[root@server1 ~]# kubectl get deployment NAME READY UP-TO-DATE AVAILABLE AGE httpd 1/1 1 1 21h nginx 1/1 1 1 6d22h [root@server1 ~]# kubectl get deployment httpd -o yaml |
When you have done it you realize that you need a tool to sanitize those generated YAML file because they are really far from lean file we see in official documentation. One tool that often came in discussions is kubectl-neat. To implement it first start by installing krew with (git is a prerequisite):
[root@server1 ~]# ( > set -x; cd "$(mktemp -d)" && > OS="$(uname | tr '[:upper:]' '[:lower:]')" && > ARCH="$(uname -m | sed -e 's/x86_64/amd64/' -e 's/\(arm\)\(64\)\?.*/\1\2/' -e 's/aarch64$/arm64/')" && > KREW="krew-${OS}_${ARCH}" && > curl -fsSLO "https://github.com/kubernetes-sigs/krew/releases/latest/download/${KREW}.tar.gz" && > tar zxvf "${KREW}.tar.gz" && > ./"${KREW}" install krew > ) ++ mktemp -d + cd /tmp/tmp.mjm5SmGWMR ++ uname ++ tr '[:upper:]' '[:lower:]' + OS=linux ++ uname -m ++ sed -e s/x86_64/amd64/ -e 's/\(arm\)\(64\)\?.*/\1\2/' -e 's/aarch64$/arm64/' + ARCH=amd64 + KREW=krew-linux_amd64 + curl -fsSLO https://github.com/kubernetes-sigs/krew/releases/latest/download/krew-linux_amd64.tar.gz + tar zxvf krew-linux_amd64.tar.gz ./LICENSE ./krew-linux_amd64 + ./krew-linux_amd64 install krew Adding "default" plugin index from https://github.com/kubernetes-sigs/krew-index.git. Updated the local copy of plugin index. Installing plugin: krew Installed plugin: krew \ | Use this plugin: | kubectl krew | Documentation: | https://krew.sigs.k8s.io/ | Caveats: | \ | | krew is now installed! To start using kubectl plugins, you need to add | | krew's installation directory to your PATH: | | | | * macOS/Linux: | | - Add the following to your ~/.bashrc or ~/.zshrc: | | export PATH="${KREW_ROOT:-$HOME/.krew}/bin:$PATH" | | - Restart your shell. | | | | * Windows: Add %USERPROFILE%\.krew\bin to your PATH environment variable | | | | To list krew commands and to get help, run: | | $ kubectl krew | | For a full list of available plugins, run: | | $ kubectl krew search | | | | You can find documentation at | | https://krew.sigs.k8s.io/docs/user-guide/quickstart/. | / / |
Control it works with:
[root@server1 ~]# export PATH="${KREW_ROOT:-$HOME/.krew}/bin:$PATH" [root@server1 ~]# kubectl krew krew is the kubectl plugin manager. You can invoke krew through kubectl: "kubectl krew [command]..." Usage: kubectl krew [command] Available Commands: completion generate the autocompletion script for the specified shell help Help about any command index Manage custom plugin indexes info Show information about an available plugin install Install kubectl plugins list List installed kubectl plugins search Discover kubectl plugins uninstall Uninstall plugins update Update the local copy of the plugin index upgrade Upgrade installed plugins to newer versions version Show krew version and diagnostics Flags: -h, --help help for krew -v, --v Level number for the log level verbosity Use "kubectl krew [command] --help" for more information about a command. |
Install kubectl-neat with:
[root@server1 ~]# kubectl krew install neat Updated the local copy of plugin index. Installing plugin: neat Installed plugin: neat \ | Use this plugin: | kubectl neat | Documentation: | https://github.com/itaysk/kubectl-neat / WARNING: You installed plugin "neat" from the krew-index plugin repository. These plugins are not audited for security by the Krew maintainers. Run them at your own risk. |
Then after if you would like to get a skeleton of a pod to create a similar one or simply extract a clean yaml pod file from a running pod to modify it you would do something like:
[root@server1 ~]# kubectl get pods NAME READY STATUS RESTARTS AGE httpd-757fb56c8d-7cdj5 1/1 Running 0 20h nginx-6799fc88d8-xg5kd 1/1 Running 0 21h httpd-757fb56c8d-7cdj5 1/1 Running 0 20h [root@server1 ~]# kubectl get pod httpd-757fb56c8d-7cdj5 -o yaml |
The problem is that this extracted yaml file contains a lot extra information, to remove all this redundant extra information use kubectl-neat with something like:
[root@server1 ~]# kubectl get pod httpd-757fb56c8d-7cdj5 -o yaml | kubectl neat [root@server1 ~]# kubectl neat get pod httpd-757fb56c8d-7cdj5 -o yaml |
Useful commands
Access a pod:
[root@server1 ~]# kubectl exec -it nginx-6799fc88d8-tdh4p -- /bin/bash root@nginx-6799fc88d8-tdh4p:/# ls -l /usr/share/nginx/html total 8 -rw-r--r-- 1 root root 494 Jul 6 14:59 50x.html -rw-r--r-- 1 root root 612 Jul 6 14:59 index.html |
Delete a deployment:
[root@server1 ~]# kubectl get deployment NAME READY UP-TO-DATE AVAILABLE AGE nginx 1/1 1 1 3d5h [root@server1 ~]# kubectl delete deployment nginx deployment.apps "nginx" deleted |
Print the supported API resources on the server:
[root@server1 ~]# kubectl api-resources |


