Even if the standard tool for your data scientist in an Hortonworks Data Platform (HDP) is Zeppelin Notebook this population would most probably want to use Jupyter Lab/Notebook that has quite a momentum in this domain.
As you might guess with the new Hive Warehouse Connector (HWC) to access Hive tables in Spark comes a bunch of problem to correctly configure Jupyter Lab/Notebook…
In short the idea is to add additional Jupyter kernels on top of the default Python 3 one. To do this either you create them on your own by creating a kernel.json file or installing one of the packages that help you to integrate the language you wish.
In this article I assume that you already have a working Anaconda installation on your server. The installation is pretty straightforward, just execute the Anaconda3-2019.10-Linux-x86_64.sh shell script (in my case) and acknowledge the licence information displayed.
JupyterHub installation
If like me you are behind a corporate proxy the first thing to do is to configure it to be able to download conda packages over Internet:
Remark It is also possible to install newest JupyterLab in Jupyterhub instead of Jupyter Notebook. If you do so you have to set c.Spawner.default_url = ‘/lab’ to instruct JupyterHub to load JupyterLab instead of Jupyter Notebook. In below I will try to mix screenshot but clearly the future is JupyterLab and not Jupyter Notebook. JupyterHub is just providing a multi user environment.
Install JupyterLab with:
conda install-c conda-forge jupyterlab
conda install -c conda-forge jupyterlab
Execute jupyterhub by just typing the command jupyterhub and access to its url at http://server.domain.com:8000. All options can obviously be configured…
As an exemple how to activate https for your Jupyterhub using a self signed certificate (free). Is not optimal but better than http…
Generate the key and certificate using below command (taken from OpenSSL Cookbook book):
(jupyterhub)[root@server ~]# openssl req -new -newkey rsa:2048 -x509 -nodes -keyout root-ocsp.key -out root-ocsp.csr
Generating a RSA private key
...................................+++++
........................................+++++
writing new private key to 'root-ocsp.key'-----
You are about to be asked to enter information that will be incorporated
into your certificate request.
What you are about to enter is what is called a Distinguished Name or a DN.
There are quite a few fields but you can leave some blank
For some fields there will be a default value,
If you enter '.', the field will be left blank.
-----
Country Name (2 letter code)[AU]:CH
State or Province Name (full name)[Some-State]:Geneva
Locality Name (eg, city)[]:Geneva
Organization Name (eg, company)[Internet Widgits Pty Ltd]:Company Name
Organizational Unit Name (eg, section)[]:
Common Name (e.g. server FQDN or YOUR name)[]:servername.domain.com
Email Address []:
(jupyterhub) [root@server ~]# openssl req -new -newkey rsa:2048 -x509 -nodes -keyout root-ocsp.key -out root-ocsp.csr
Generating a RSA private key
...................................+++++
........................................+++++
writing new private key to 'root-ocsp.key'
-----
You are about to be asked to enter information that will be incorporated
into your certificate request.
What you are about to enter is what is called a Distinguished Name or a DN.
There are quite a few fields but you can leave some blank
For some fields there will be a default value,
If you enter '.', the field will be left blank.
-----
Country Name (2 letter code) [AU]:CH
State or Province Name (full name) [Some-State]:Geneva
Locality Name (eg, city) []:Geneva
Organization Name (eg, company) [Internet Widgits Pty Ltd]:Company Name
Organizational Unit Name (eg, section) []:
Common Name (e.g. server FQDN or YOUR name) []:servername.domain.com
Email Address []:
Finally I have configured only three below parameters in jupyterhub_config.py configuration file:
Simply execute juyterhub command to run JupyterHub, of course creating a service that start with server boot is more than recommended.
Then accessing to https url you see login window without the HTTP warning (you will have to add the self signed certificate as a trusted server in your browser).
Jupyter kernels manual configuration
Connect with an existing OS account created onto server where JupyterHub is running:
jupyterhub01
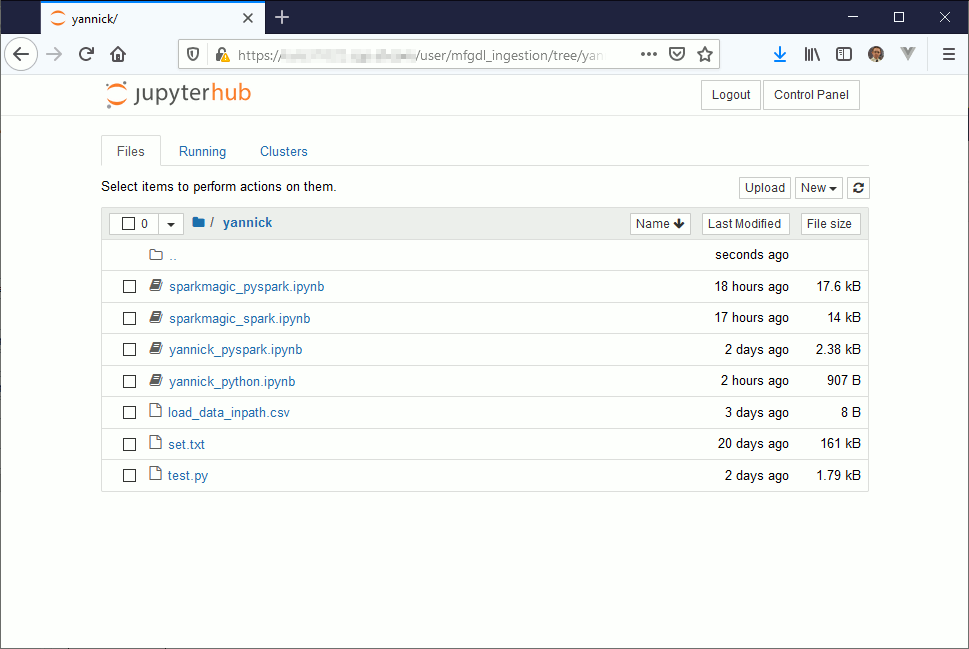
Create a new Python 3 notebook (yannick_python.ipynb in my example, but as you can see I have many others):
jupyterhub02
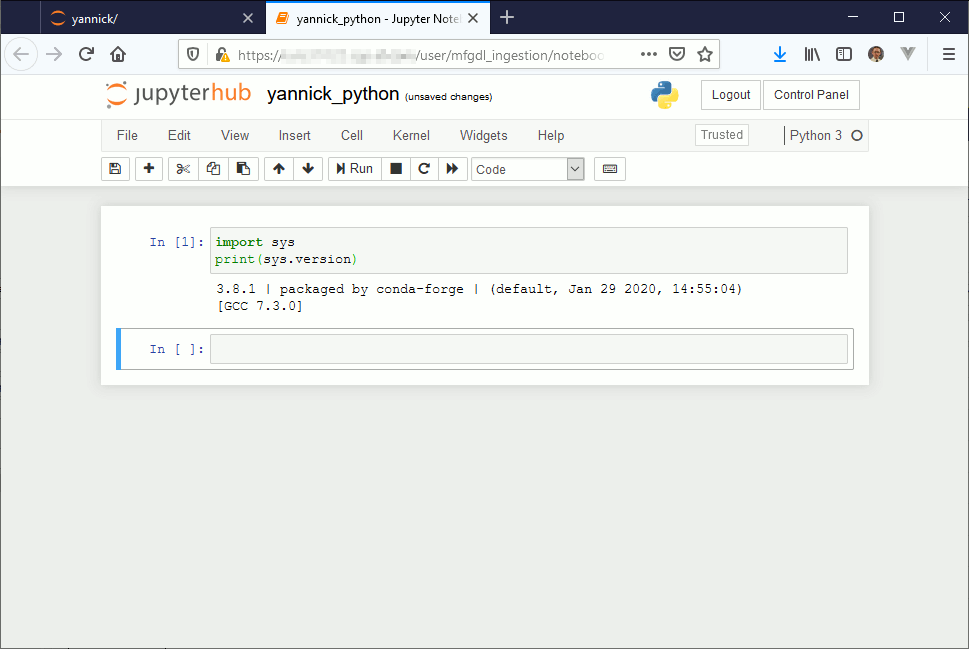
And this below dummy example should work:
jupyterhub03
Obvosuly our goal here is not to do Python but Spark. To manually create a Pyspark kernel create the kernel directory in home installation of your Jupyterhub:
[root@server ~]# cd /opt/anaconda3/envs/jupyterhub/share/jupyter/kernels(jupyterhub)[root@server kernels]# ll
total 0
drwxr-xr-x 2 root root 69 Feb 1814:20 python3
(jupyterhub)[root@server kernels]# mkdir pyspark_kernel
[root@server ~]# cd /opt/anaconda3/envs/jupyterhub/share/jupyter/kernels
(jupyterhub) [root@server kernels]# ll
total 0
drwxr-xr-x 2 root root 69 Feb 18 14:20 python3
(jupyterhub) [root@server kernels]# mkdir pyspark_kernel
(jupyterhub)[root@server ~]# jupyter-kernelspec list
Available kernels:
pyspark_kernel /opt/anaconda3/envs/jupyterhub/share/jupyter/kernels/pyspark_kernel
python3 /opt/anaconda3/envs/jupyterhub/share/jupyter/kernels/python3
(jupyterhub) [root@server ~]# jupyter-kernelspec list
Available kernels:
  pyspark_kernel    /opt/anaconda3/envs/jupyterhub/share/jupyter/kernels/pyspark_kernel
  python3           /opt/anaconda3/envs/jupyterhub/share/jupyter/kernels/python3
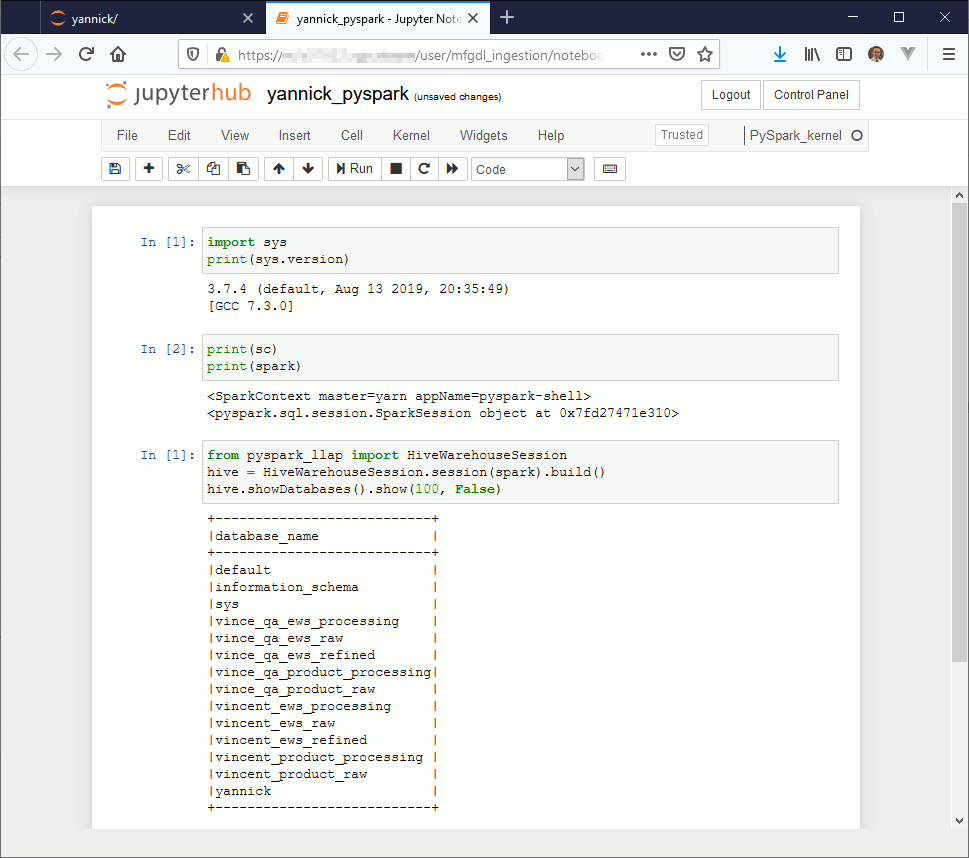
If you create a new Jupyter Notebook and choose PySpark_kernel you should be able to execute below sample code:
jupyterhub04
So far I have not yet found on how to create a Spark Scala manual kernel, any insight is welcome…
Sparkmagic Jupyter kernels configuration
On the list of Jupyter available kernel there is one (IMHO) that comes more often than the competition: Sparkmagic.
Install it with:
conda install-c conda-forge sparkmagic
conda install -c conda-forge sparkmagic
Once done install the Sparkmagic kernel with:
(jupyterhub)[root@server kernels]# cd /opt/anaconda3/envs/jupyterhub/lib/python3.8/site-packages/sparkmagic/kernels(jupyterhub)[root@server kernels]# ll
total 28-rw-rw-r--2 root root 46 Jan 2314:36 __init__.py
-rw-rw-r--2 root root 20719 Jan 2314:36 kernelmagics.py
drwxr-xr-x 2 root root 72 Feb 1816:48 __pycache__
drwxr-xr-x 3 root root 104 Feb 1816:48 pysparkkernel
drwxr-xr-x 3 root root 102 Feb 1816:48 sparkkernel
drwxr-xr-x 3 root root 103 Feb 1816:48 sparkrkernel
drwxr-xr-x 3 root root 95 Feb 1816:48 wrapperkernel
(jupyterhub)[root@server kernels]# jupyter-kernelspec install sparkrkernel[InstallKernelSpec] Installed kernelspec sparkrkernel in/usr/local/share/jupyter/kernels/sparkrkernel
(jupyterhub)[root@server kernels]# jupyter-kernelspec install sparkkernel[InstallKernelSpec] Installed kernelspec sparkkernel in/usr/local/share/jupyter/kernels/sparkkernel
(jupyterhub)[root@server kernels]# jupyter-kernelspec install pysparkkernel[InstallKernelSpec] Installed kernelspec pysparkkernel in/usr/local/share/jupyter/kernels/pysparkkernel
(jupyterhub)[root@server kernels]# jupyter-kernelspec list
Available kernels:
pysparkkernel /opt/anaconda3/envs/jupyterhub/share/jupyter/kernels/pysparkkernel
python3 /opt/anaconda3/envs/jupyterhub/share/jupyter/kernels/python3
sparkkernel /opt/anaconda3/envs/jupyterhub/share/jupyter/kernels/sparkkernel
sparkrkernel /opt/anaconda3/envs/jupyterhub/share/jupyter/kernels/sparkrkernel
(jupyterhub) [root@server kernels]# cd /opt/anaconda3/envs/jupyterhub/lib/python3.8/site-packages/sparkmagic/kernels
(jupyterhub) [root@server kernels]# ll
total 28
-rw-rw-r-- 2 root root    46 Jan 23 14:36 __init__.py
-rw-rw-r-- 2 root root 20719 Jan 23 14:36 kernelmagics.py
drwxr-xr-x 2 root root    72 Feb 18 16:48 __pycache__
drwxr-xr-x 3 root root   104 Feb 18 16:48 pysparkkernel
drwxr-xr-x 3 root root   102 Feb 18 16:48 sparkkernel
drwxr-xr-x 3 root root   103 Feb 18 16:48 sparkrkernel
drwxr-xr-x 3 root root    95 Feb 18 16:48 wrapperkernel
(jupyterhub) [root@server kernels]# jupyter-kernelspec install sparkrkernel
[InstallKernelSpec] Installed kernelspec sparkrkernel in /usr/local/share/jupyter/kernels/sparkrkernel
(jupyterhub) [root@server kernels]# jupyter-kernelspec install sparkkernel
[InstallKernelSpec] Installed kernelspec sparkkernel in /usr/local/share/jupyter/kernels/sparkkernel
(jupyterhub) [root@server kernels]# jupyter-kernelspec install pysparkkernel
[InstallKernelSpec] Installed kernelspec pysparkkernel in /usr/local/share/jupyter/kernels/pysparkkernel
(jupyterhub) [root@server kernels]# jupyter-kernelspec list
Available kernels:
  pysparkkernel    /opt/anaconda3/envs/jupyterhub/share/jupyter/kernels/pysparkkernel
  python3          /opt/anaconda3/envs/jupyterhub/share/jupyter/kernels/python3
  sparkkernel      /opt/anaconda3/envs/jupyterhub/share/jupyter/kernels/sparkkernel
  sparkrkernel     /opt/anaconda3/envs/jupyterhub/share/jupyter/kernels/sparkrkernel
In the home directory of the account with which you will connect to JupyterHub create a .sparkmagic directory and create a file that is a copy of provided config.json.
In this file modify at least for each kernel_xxx_credentials section the url to map your Livy server name and port:
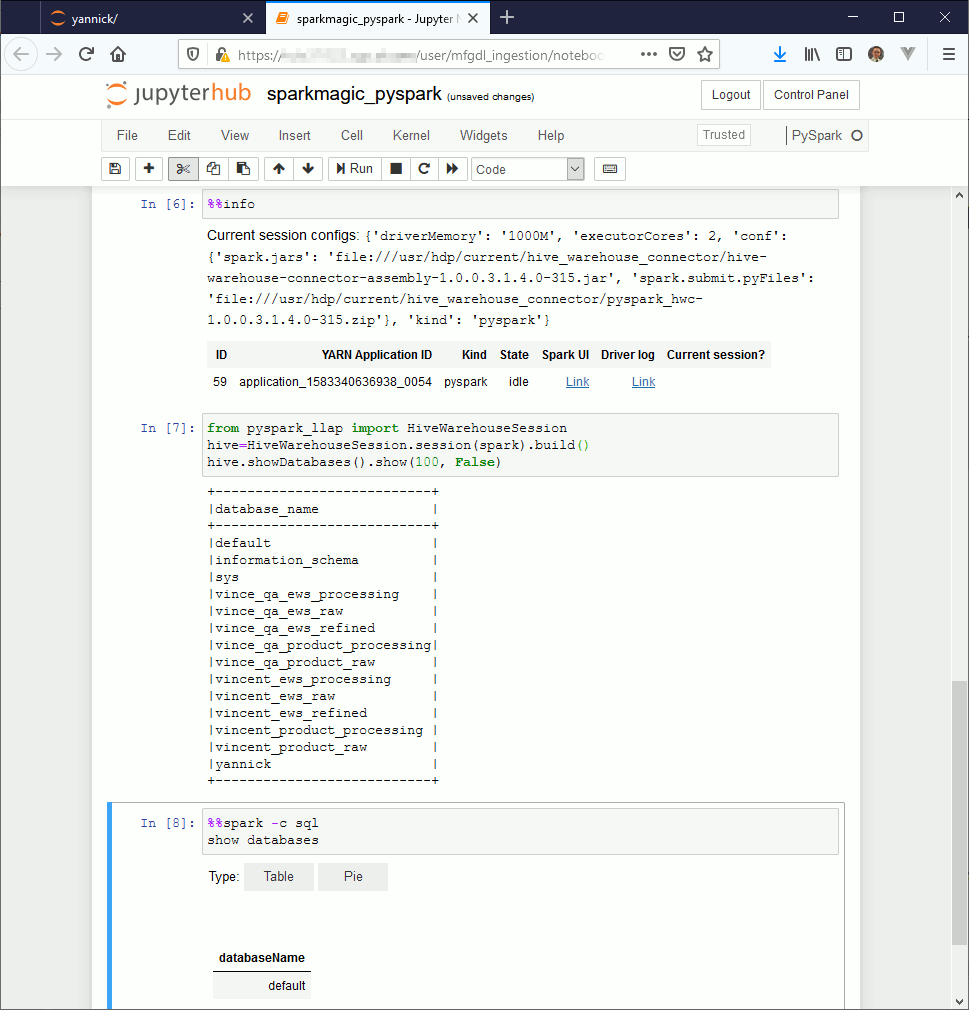
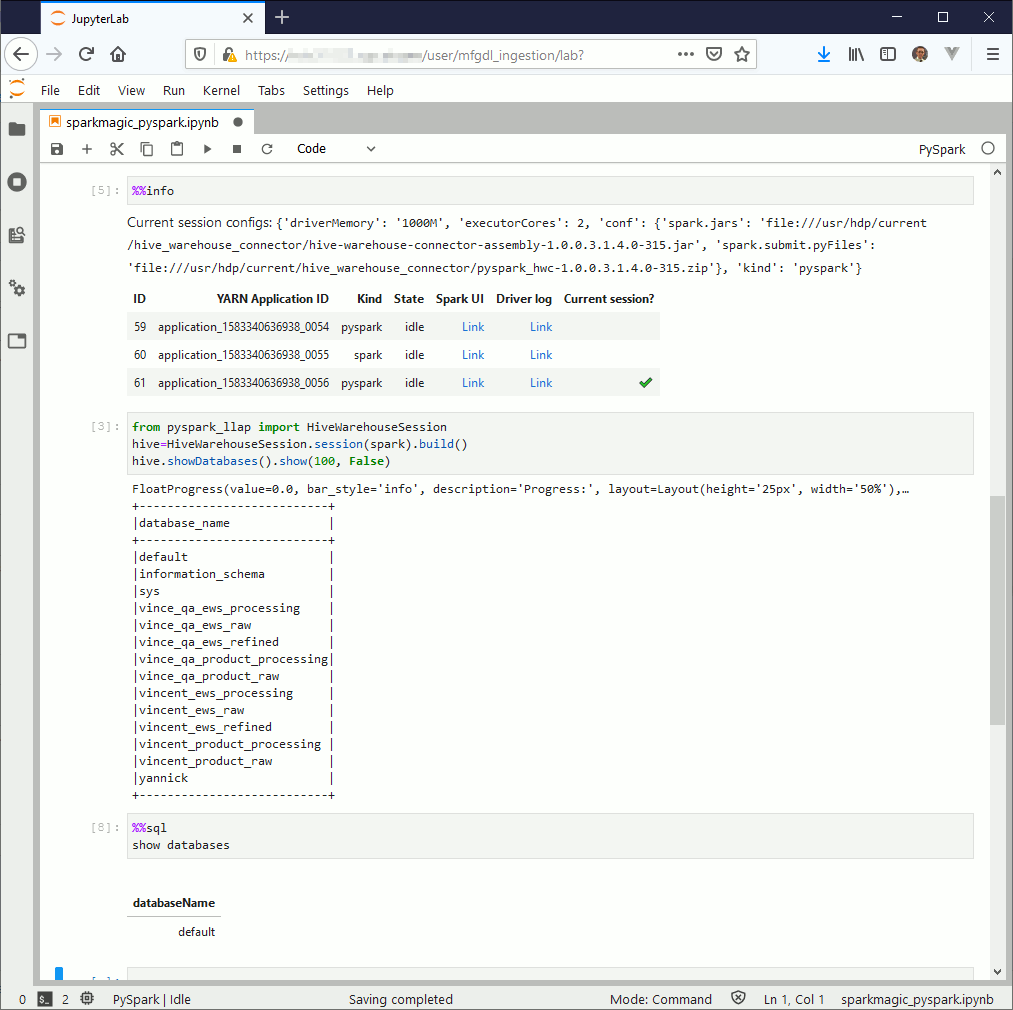
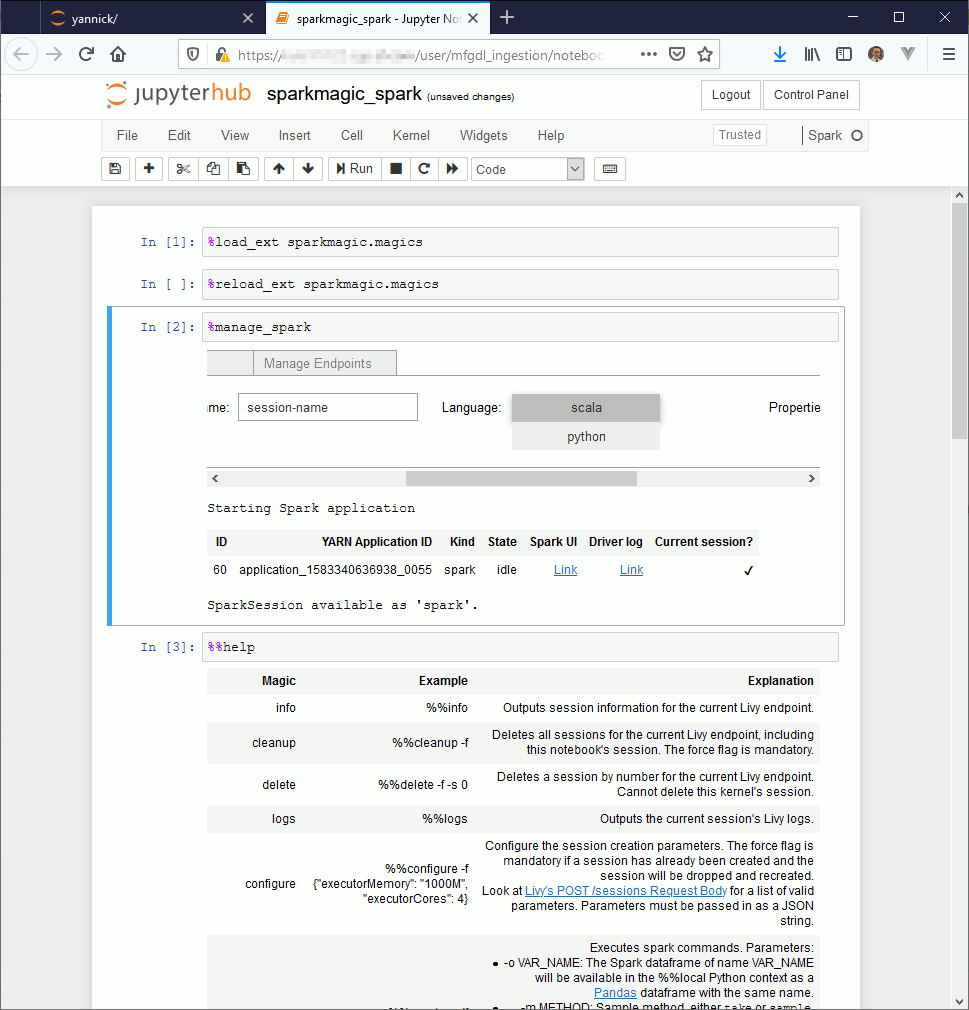
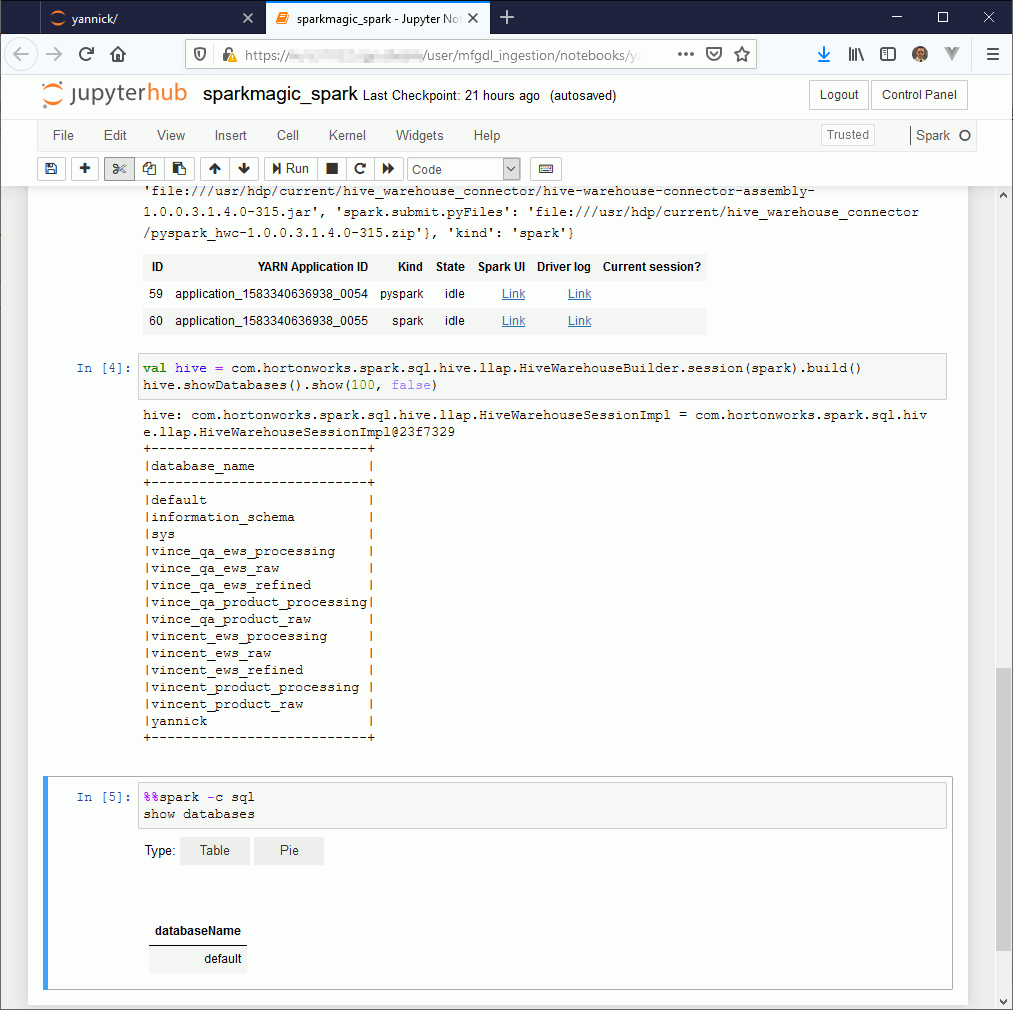
If you then create new notebook using PySpark or Spark whether you want to use Python or Scala you should be able to run the below exemples.
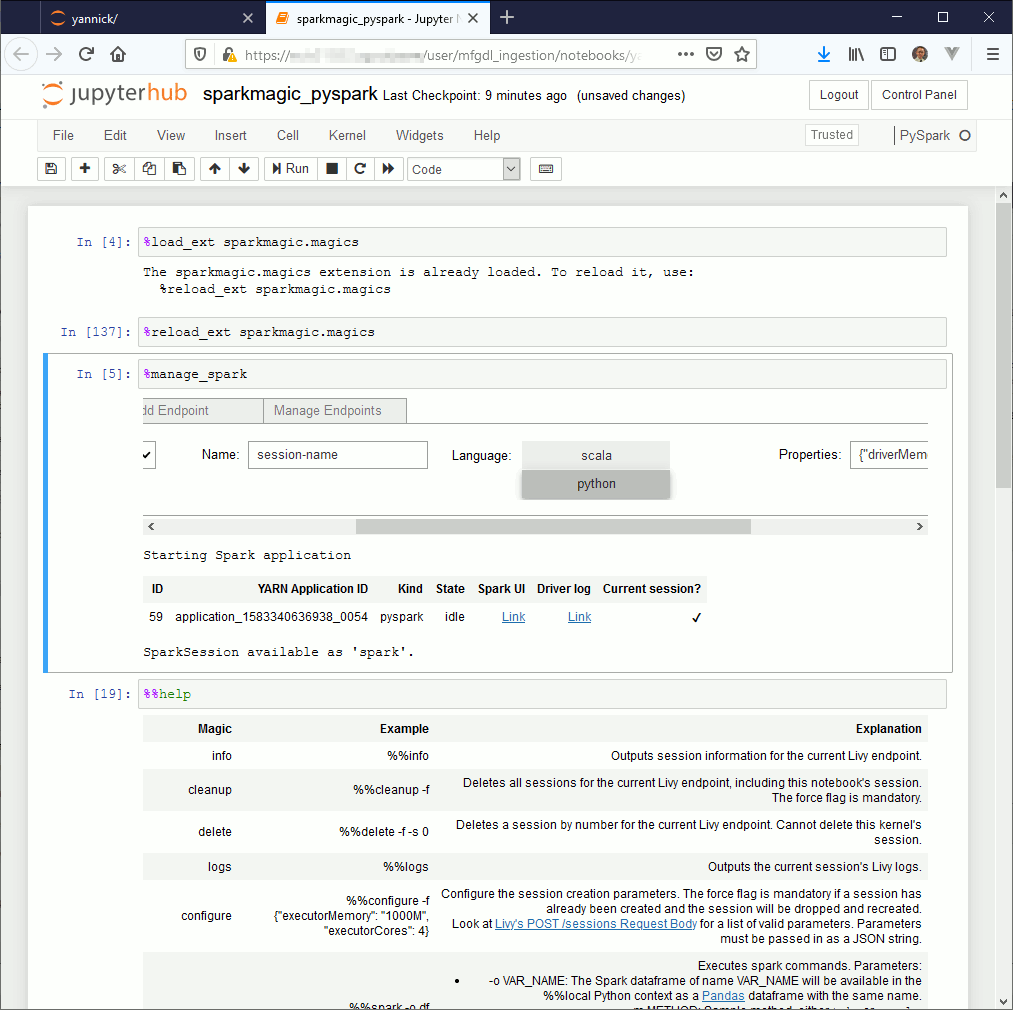
If you use Jupyter Notebook the first command to execute is magic command %load_ext sparkmagic.magics then create a session using magic command %manage_spark select either Scala or Python (remain the question of R language but I do not use it). If you use JupyterLab you can directly start to work as the %manage_spark command does not work. The Livy session should be automatically created while executing the first command, should also be the same with Jupyter Notebook but I had few issues with this so…
Few other magic commands are quite interesting:
%%help to get list of available command
%%info to see if your Livy session is still active (many issue can come from this)
PySpark exemple (the SQL part is still broken due to HWC):