Table of contents
Preamble
With the rise of our Cloud migration and hybrid way of working and our SAP Hana migration one of my colleague ask me about on how to transfert on-premise Oracle database information to the Cloud. His high level idea is to make them hitting a Kafka installation we are trying to implement to duplicate events from on-premise to the cloud and open the door to more heterogenous scenarios. The direct answer to this problem is GoldenGate Kafka Handlers !
To try to answer his questions and clear my mind I have decided to implement a simple GoldenGate implementation and a dummy Kafka implementation as well as configuring different Kafka Handlers. I initially thought only GoldenGate for Big Data was required but I have understood that GoldenGate for Big Data requires a traditional GoldenGate installation and is reading files directly from this legacy GoldenGate installation.
You cannot extract (capture) Oracle figures with GoldenGate for Big Data (OGG-01115 Function dbLogin not implemented). GoldenGate for Big Data reads trail files extracted with GoldenGate (for Oracle database).
Even if on the paper I have no issue with this I would say that from license standpoint this is a complete different story. Legacy GoldenGate for Oracle Database public license price is 17,500$ for two x86 cores and GoldenGate for Big Data public license price is 20,000$ for two x86 cores (on top of this you have 22% of maintenance each year).
This blog post will be done in two parts. First part will be binaries installation and basic components configuration. Second part will be simple test case configuration as well as trying to make it working…
Proof Of Concept components version:
- Oracle Database 19c Enterprise Edition Release 19.0.0.0.0 – Version 19.3.0.0.0 (RU)
- Oracle GoldenGate 19.1.0.0.4 for Oracle on Linux x86-64, 530.5 MB (V983658-01.zip)
- Oracle GoldenGate for Big Data 19.1.0.0.1 on Linux x86-64, 88.7 MB (V983760-01.zip)
- Scala 2.13 – kafka_2.13-2.7.0.tgz (65 MB)
- OpenJDK 1.8.0 (chosen 8 even if 11 was available…)
Exact OpenJDK version is (I have chosen OpenJDK just to try it following the new licensing model of Oracle JDK):
[oracle@server01 ~]$ java -version openjdk version "1.8.0_275" OpenJDK Runtime Environment (build 1.8.0_275-b01) OpenJDK 64-Bit Server VM (build 25.275-b01, mixed mode) |
My test server is a dual socket Intel(R) Xeon(R) CPU E5-2620 v3 @ 2.40GHz 6 cores (12 cores total, 24 thread) physical server with 64GB of RAM. I have installed all components on this unique quite powerful server.
19c pluggable database configuration
The source database I plan to use is a pluggable database called PDB1:
SQL> show pdbs CON_ID CON_NAME OPEN MODE RESTRICTED ---------- ------------------------------ ---------- ---------- 2 PDB$SEED READ ONLY NO 3 PDB1 READ WRITE NO |
I have a TNS entry called pdb1 for it:
[oracle@server01 ~]$ tnsping pdb1 TNS Ping Utility for Linux: Version 19.0.0.0.0 - Production on 21-JAN-2021 11:52:02 Copyright (c) 1997, 2019, Oracle. All rights reserved. Used parameter files: /u01/app/oracle/product/19.0.0/dbhome_1/network/admin/sqlnet.ora Used TNSNAMES adapter to resolve the alias Attempting to contact (DESCRIPTION = (ADDRESS = (PROTOCOL = TCP)(HOST = server01.domain.com)(PORT = 1531)) (CONNECT_DATA = (SERVER = DEDICATED) (SERVICE_NAME = pdb1))) OK (0 msec) |
I can connect to my root container with an sql alias set to ‘rlwrap sqlplus / as sysdba’.
First thing to do is to change log mode of my instance:
SQL> SELECT log_mode,supplemental_log_data_min, force_logging FROM v$database; LOG_MODE SUPPLEME FORCE_LOGGING ------------ -------- --------------------------------------- NOARCHIVELOG NO NO SQL> show parameter db_recovery_file_dest NAME TYPE VALUE ------------------------------------ ----------- ------------------------------ db_recovery_file_dest string /u01/app/oracle/product/19.0.0 /fast_recovery_area db_recovery_file_dest_size big INTEGER 1G SQL> shutdown IMMEDIATE; DATABASE closed. DATABASE dismounted. ORACLE instance shut down. SQL> startup mount ORACLE instance started. Total SYSTEM Global Area 1073738400 bytes Fixed SIZE 9142944 bytes Variable SIZE 528482304 bytes DATABASE Buffers 528482304 bytes Redo Buffers 7630848 bytes DATABASE mounted. SQL> ALTER DATABASE archivelog; DATABASE altered. SQL> ALTER DATABASE OPEN; DATABASE altered. SQL> ALTER SYSTEM SET enable_goldengate_replication=TRUE scope=both; SYSTEM altered. SQL> SELECT log_mode,supplemental_log_data_min, force_logging FROM v$database; LOG_MODE SUPPLEME FORCE_LOGGING ------------ -------- --------------------------------------- ARCHIVELOG NO NO SQL> show pdbs CON_ID CON_NAME OPEN MODE RESTRICTED ---------- ------------------------------ ---------- ---------- 2 PDB$SEED READ ONLY NO 3 PDB1 MOUNTED SQL> ALTER pluggable DATABASE pdb1 OPEN; Pluggable DATABASE altered. SQL> ALTER pluggable DATABASE pdb1 save state; Pluggable DATABASE altered. SQL> show pdbs CON_ID CON_NAME OPEN MODE RESTRICTED ---------- ------------------------------ ---------- ---------- 2 PDB$SEED READ ONLY NO 3 PDB1 READ WRITE NO |
I could have added supplemental log and force logging at container level with below commands, but decided to try to do it at pluggable database level:
SQL> ALTER DATABASE ADD SUPPLEMENTAL LOG DATA; DATABASE altered. SQL> ALTER DATABASE FORCE LOGGING; DATABASE altered. |
First try to change logging mode and supplemental log at pluggable database level was a complete failure:
SQL> ALTER pluggable DATABASE pdb1 enable force logging; ALTER pluggable DATABASE pdb1 enable force logging * ERROR AT line 1: ORA-65046: operation NOT allowed FROM outside a pluggable DATABASE SQL> ALTER pluggable DATABASE pdb1 ADD supplemental LOG data; ALTER pluggable DATABASE pdb1 ADD supplemental LOG data * ERROR AT line 1: ORA-65046: operation NOT allowed FROM outside a pluggable DATABASE SQL> ALTER SESSION SET container=pdb1; SESSION altered. SQL> ALTER pluggable DATABASE pdb1 enable force logging; ALTER pluggable DATABASE pdb1 enable force logging * ERROR AT line 1: ORA-65045: pluggable DATABASE NOT IN a restricted MODE SQL> ALTER pluggable DATABASE pdb1 ADD supplemental LOG data; ALTER pluggable DATABASE pdb1 ADD supplemental LOG data * ERROR AT line 1: ORA-31541: Supplemental logging IS NOT enabled IN CDB$ROOT. Ant TO put a pluggable DATABASE IN restricted MODE you have TO STOP it FIRST: SQL> ALTER pluggable DATABASE pdb1 OPEN restricted; ALTER pluggable DATABASE pdb1 OPEN restricted * ERROR AT line 1: ORA-65019: pluggable DATABASE PDB1 already OPEN |
Activate minimal supplemental logging at container level:
SQL> ALTER SESSION SET container=cdb$root; SESSION altered. SQL> show pdbs CON_ID CON_NAME OPEN MODE RESTRICTED ---------- ------------------------------ ---------- ---------- 2 PDB$SEED READ ONLY NO 3 PDB1 READ WRITE YES SQL> ALTER DATABASE ADD SUPPLEMENTAL LOG DATA; DATABASE altered. SQL> SELECT * FROM cdb_supplemental_logging; MIN PRI UNI FOR ALL PRO SUB CON_ID --- --- --- --- --- --- --- ---------- YES NO NO NO NO NO NO 1 |
Once minimal supplemental logging has been activated at container level then all pdbs have it immediately (but no harm to issue the command again):
SQL> ALTER SESSION SET container=pdb1; SESSION altered. SQL> SELECT * FROM cdb_supplemental_logging; MIN PRI UNI FOR ALL PRO SUB CON_ID --- --- --- --- --- --- --- ---------- YES NO NO NO NO NO NO 3 SQL> SET lines 200 SQL> col pdb_name FOR a10 SQL> SELECT pdb_name, logging, force_logging FROM cdb_pdbs; PDB_NAME LOGGING FORCE_LOGGING ---------- --------- --------------------------------------- PDB1 LOGGING YES PDB$SEED LOGGING NO SQL> ALTER SESSION SET container=pdb1; SESSION altered. SQL> SELECT * FROM cdb_supplemental_logging; MIN PRI UNI FOR ALL PRO SUB CON_ID --- --- --- --- --- --- --- ---------- YES NO NO NO NO NO NO 3 SQL> ALTER pluggable DATABASE pdb1 ADD supplemental LOG data; Pluggable DATABASE altered. SQL> ALTER pluggable DATABASE pdb1 enable force logging; Pluggable DATABASE altered. SQL> SELECT pdb_name, logging, force_logging FROM cdb_pdbs; PDB_NAME LOGGING FORCE_LOGGING ---------- --------- --------------------------------------- PDB1 LOGGING YES SQL> SELECT log_mode,supplemental_log_data_min, force_logging FROM v$database; LOG_MODE SUPPLEME FORCE_LOGGING ------------ -------- --------------------------------------- ARCHIVELOG YES NO |
Complete the configuration by switching log file and putting back pluggable database in non-restricted mode:
SQL> ALTER SESSION SET container=cdb$root; SESSION altered. SQL> ALTER SYSTEM SWITCH LOGFILE; SYSTEM altered. SQL> show pdbs; CON_ID CON_NAME OPEN MODE RESTRICTED ---------- ------------------------------ ---------- ---------- 2 PDB$SEED READ ONLY NO 3 PDB1 READ WRITE YES SQL> ALTER pluggable DATABASE pdb1 CLOSE IMMEDIATE; Pluggable DATABASE altered. SQL> ALTER pluggable DATABASE pdb1 OPEN read WRITE; Pluggable DATABASE altered. SQL> show pdbs; CON_ID CON_NAME OPEN MODE RESTRICTED ---------- ------------------------------ ---------- ---------- 2 PDB$SEED READ ONLY NO 3 PDB1 READ WRITE NO |
Create the global ggadmin GoldenGate administrative user on your container database as specified in documentation. What is not clear to me in the documentation is that this global user should be able to connect to all containers of your multitenant database:
SQL> CREATE USER c##ggadmin IDENTIFIED BY secure_password; USER created. SQL> GRANT CREATE SESSION, CONNECT, RESOURCE, ALTER SYSTEM, SELECT ANY DICTIONARY, UNLIMITED TABLESPACE TO c##ggadmin CONTAINER=ALL; GRANT succeeded. SQL> EXEC DBMS_GOLDENGATE_AUTH.GRANT_ADMIN_PRIVILEGE(grantee=>'c##ggadmin', privilege_type=>'CAPTURE', grant_optional_privileges=>'*', container=>'ALL'); PL/SQL PROCEDURE successfully completed. |
GoldenGate 19.1 installation
Installation is pretty straightforward and I have already done it with GoldenGate 12c. Just locate the runInstaller file in the folder where you have unzipped the downloaded file. Choose your database version:
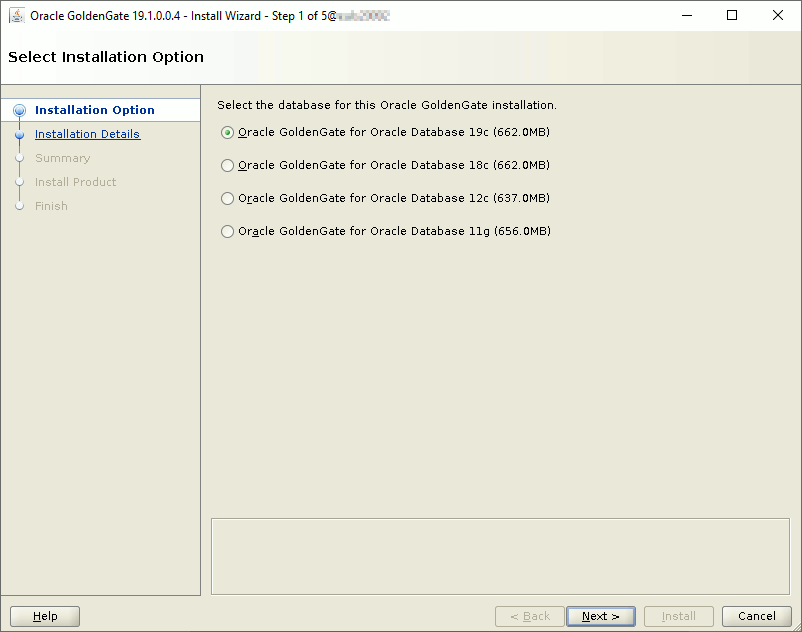
Choose the target installation directory:
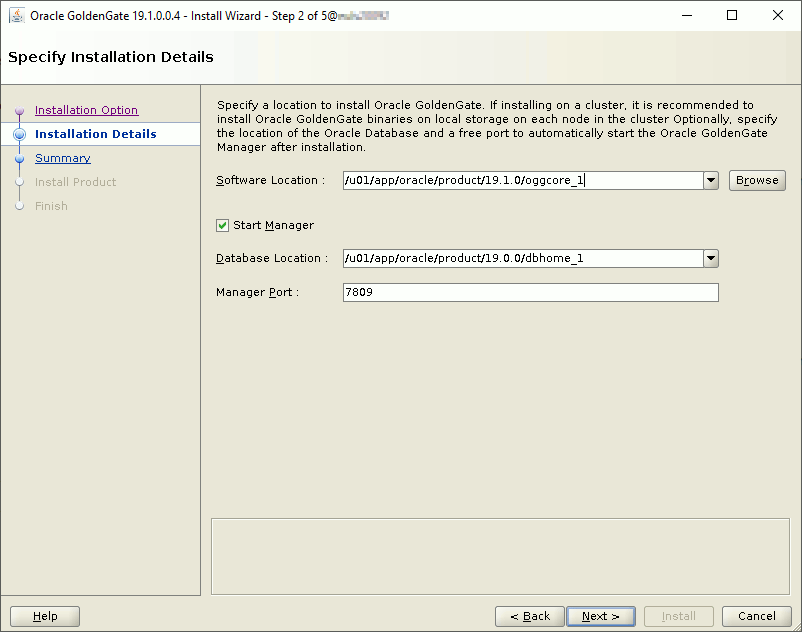
Then installation is already over with GoldenGate manager already configured (port is 7809) and running:

You can immediately test it with:
[oracle@server01 ~]$ /u01/app/oracle/product/19.1.0/oggcore_1/ggsci Oracle GoldenGate Command Interpreter for Oracle Version 19.1.0.0.4 OGGCORE_19.1.0.0.0_PLATFORMS_191017.1054_FBO Linux, x64, 64bit (optimized), Oracle 19c on Oct 17 2019 21:16:29 Operating system character set identified as UTF-8. Copyright (C) 1995, 2019, Oracle and/or its affiliates. All rights reserved. GGSCI (server01) 1> info mgr Manager is running (IP port TCP:server01.7809, Process ID 13243). |
You can add the directory to your PATH or to not mess-up with GoldenGate for Big Data create an alias to be 100% of the one you are launching (this is also the opportunity to club with rlwrap). So I created ggsci_gg alias in my profile for this traditional GoldenGate installation:
alias ggsci_gg='rlwrap /u01/app/oracle/product/19.1.0/oggcore_1/ggsci' |
GoldenGate 19.1 for Big Data Installation
Install Open JDK 1.8 with:
[root@server01 ~]# yum install java-1.8.0-openjdk.x86_64 |
Add to your profile:
export JAVA_HOME=/usr/lib/jvm/java-1.8.0-openjdk-1.8.0.275.b01-0.el7_9.x86_64/jre export PATH=$JAVA_HOME/bin:$PATH export LD_LIBRARY_PATH=$JAVA_HOME/lib/amd64/server:$LD_LIBRARY_PATH |
Install GoldenGate for Big Data with a simple unzip/untar:
[oracle@server01 ~]$ mkdir -p /u01/app/oracle/product/19.1.0/oggbigdata_1 [oracle@server01 19.1.0]$ cd /u01/app/oracle/product/19.1.0/oggbigdata_1 [oracle@server01 oggbigdata_1]$ cp /u01/V983760-01.zip . [oracle@server01 oggbigdata_1]$ unzip V983760-01.zip Archive: V983760-01.zip inflating: OGGBD-19.1.0.0-README.txt inflating: OGG_BigData_19.1.0.0.1_Release_Notes.pdf inflating: OGG_BigData_Linux_x64_19.1.0.0.1.tar [oracle@server01 oggbigdata_1]$ tar xvf OGG_BigData_Linux_x64_19.1.0.0.1.tar . . [oracle@server01 oggbigdata_1]$ rm OGG_BigData_Linux_x64_19.1.0.0.1.tar V983760-01.zip |
I also added this alias in my profile:
alias ggsci_bd='rlwrap /u01/app/oracle/product/19.1.0/oggbigdata_1/ggsci' |
Create GoldenGate for Big Data subdirectory and configure Manager process:
[oracle@server01 ~]$ ggsci_bd Oracle GoldenGate for Big Data Version 19.1.0.0.1 (Build 003) Oracle GoldenGate Command Interpreter Version 19.1.0.0.2 OGGCORE_OGGADP.19.1.0.0.2_PLATFORMS_190916.0039 Linux, x64, 64bit (optimized), Generic on Sep 16 2019 02:12:32 Operating system character set identified as UTF-8. Copyright (C) 1995, 2019, Oracle and/or its affiliates. All rights reserved. GGSCI (server01) 1> create subdirs Creating subdirectories under current directory /u01/app/oracle/product/19.1.0/oggbigdata_1 Parameter file /u01/app/oracle/product/19.1.0/oggbigdata_1/dirprm: created. Report file /u01/app/oracle/product/19.1.0/oggbigdata_1/dirrpt: created. Checkpoint file /u01/app/oracle/product/19.1.0/oggbigdata_1/dirchk: created. Process status files /u01/app/oracle/product/19.1.0/oggbigdata_1/dirpcs: created. SQL script files /u01/app/oracle/product/19.1.0/oggbigdata_1/dirsql: created. Database definitions files /u01/app/oracle/product/19.1.0/oggbigdata_1/dirdef: created. Extract data files /u01/app/oracle/product/19.1.0/oggbigdata_1/dirdat: created. Temporary files /u01/app/oracle/product/19.1.0/oggbigdata_1/dirtmp: created. Credential store files /u01/app/oracle/product/19.1.0/oggbigdata_1/dircrd: created. Masterkey wallet files /u01/app/oracle/product/19.1.0/oggbigdata_1/dirwlt: created. Dump files /u01/app/oracle/product/19.1.0/oggbigdata_1/dirdmp: created. GGSCI (server01) 2> edit params mgr |
Insert ‘port 7801’ in manager parameter file. Then start manager with:
GGSCI (server01) 1> view params mgr port 7801 GGSCI (server01) 3> start mgr Manager started. GGSCI (server01) 4> info mgr Manager is running (IP port TCP:server01.7801, Process ID 11186). |
Kafka configuration
For Kafka I’m just following the official quick start documentation. I have just created a dedicated (original) kafka account to run kafka processes. I have also use nohup command not to lock too many shells. As the size is small I have installed Kafka in the home directory of my kafka account (never ever do this in production):
[kafka@server01 ~]$ pwd /home/kafka [kafka@server01 ~]$ tar -xzf /tmp/kafka_2.13-2.7.0.tgz [kafka@server01 ~]$ ll total 0 drwxr-x--- 6 kafka users 89 Dec 16 15:03 kafka_2.13-2.7.0 [kafka@server01 ~]$ cd kafka_2.13-2.7.0/ [kafka@server01 ~]$ nohup /home/kafka/kafka_2.13-2.7.0/bin/zookeeper-server-start.sh config/zookeeper.properties > zookeeper.log & [kafka@server01 ~]$ nohup /home/kafka/kafka_2.13-2.7.0/bin/kafka-server-start.sh config/server.properties > broker_service.log & |
Then I have done topic creation and dummy events creation and, obviously, all went well…
References
- Streaming data from Oracle into Kafka
- No More Silos: How to Integrate Your Databases with Apache Kafka and CDC
- ADD SUPPLEMENTAL LOG Command in PDB is not reflected to v$database (Doc ID 2198780.1)


