Table of contents
Preamble
An off subject blog post for once, but I have spent a bit of time on this so sharing the few simple steps needed to digitally signed your PDF i.e. inserting a PDF signature.
What a pleasure to digitally signed your PDF file with your own certificate and put a stamp of this certificate in first page of your own generated PDF documents. Of course your own signature will never be validated by one of the recognized companies (Verisign, CAcert, …) but at least your signature appears in first page of document (and not only your name in document properties) and provides a “professional” look to your creation.
To achieve this you need a server with OpenSSL (any Linux box have it) and I’m personally using PDF Creator to generate PDF file from Word or Power Point documents. I obviously also configure the security option to avoid copy/paste…
Certificate generation
Server I’m using:
[root]# uname -a Linux localhost 2.6.18-274.3.1.el5 #1 SMP Fri Aug 26 18:49:02 EDT 2011 x86_64 x86_64 x86_64 GNU/Linux [root]# cat /etc/redhat-release Red Hat Enterprise Linux Server release 5.5 (Tikanga) |
First generate RSA parameters with something like:
[root]# rm -rf private [root]# mkdir private [root]# openssl genrsa -des3 -out private/ca.key 2048 Generating RSA private key, 2048 bit long modulus .........................................................................+++ ......+++ e is 65537 (0x10001) Enter pass phrase for private/ca.key: Verifying - Enter pass phrase for private/ca.key: |
X.509 Certificate Signing Request (CSR) Management, with my own server that’s why it will not be a validated signature:
[root]# rm -rf certs [root]# mkdir certs [root]# openssl req -new -x509 -days 0 -keyout private/ca.key -out certs/ca.crt Generating a 1024 bit RSA private key ........++++++ .++++++ writing new private key to 'private/ca.key' Enter PEM pass phrase: Verifying - Enter PEM pass phrase: ----- You are about to be asked to enter information that will be incorporated into your certificate request. What you are about to enter is what is called a Distinguished Name or a DN. There are quite a few fields but you can leave some blank For some fields there will be a default value, If you enter '.', the field will be left blank. ----- Country Name (2 letter code) [GB]:CH State or Province Name (full name) [Berkshire]:Geneva Locality Name (eg, city) [Newbury]:Geneva Organization Name (eg, company) [My Company Ltd]:STMicroelectronics Organizational Unit Name (eg, section) []:ICT Common Name (eg, your name or your server's hostname) []:Yannick Jaquier Email Address []:yannick.jaquier@st.com |
PKCS#12 Data Management, managing the creation of the p12 file (yannick_jaquier_myown_certificate.p12) that will be the signature file:
[root]# openssl pkcs12 -export -in certs/ca.crt -out yannick_jaquier_myown_certificate.p12 -inkey private/ca.key -certfile certs/ca.crt -name "Self Generated Certificate" Enter pass phrase for private/ca.key: Enter Export Password: Verifying - Enter Export Password: |
Final signature file:
[root@server1 STMoracleagent]# ll yannick* -rw-r----- 1 root root 3034 Nov 10 15:10 yannick_jaquier_myown_certificate.p12 |
PDF Creator configuration
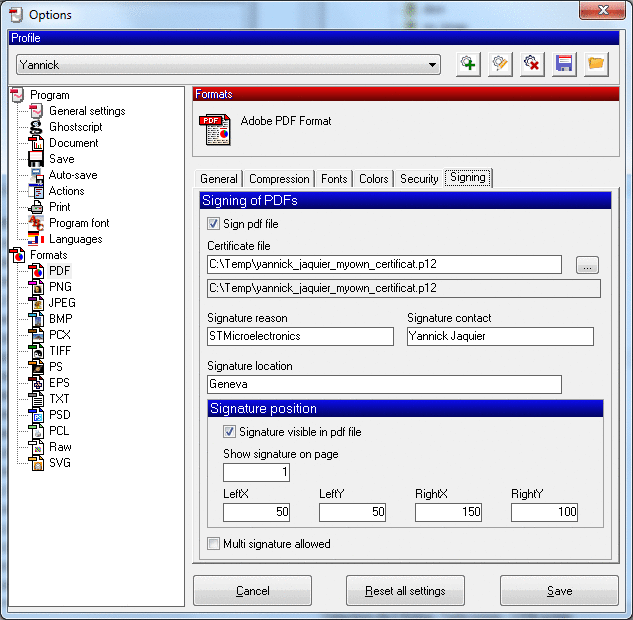
Better than long explanation a screen shot of PDF Creator signing configuration tab:

PDF signature result
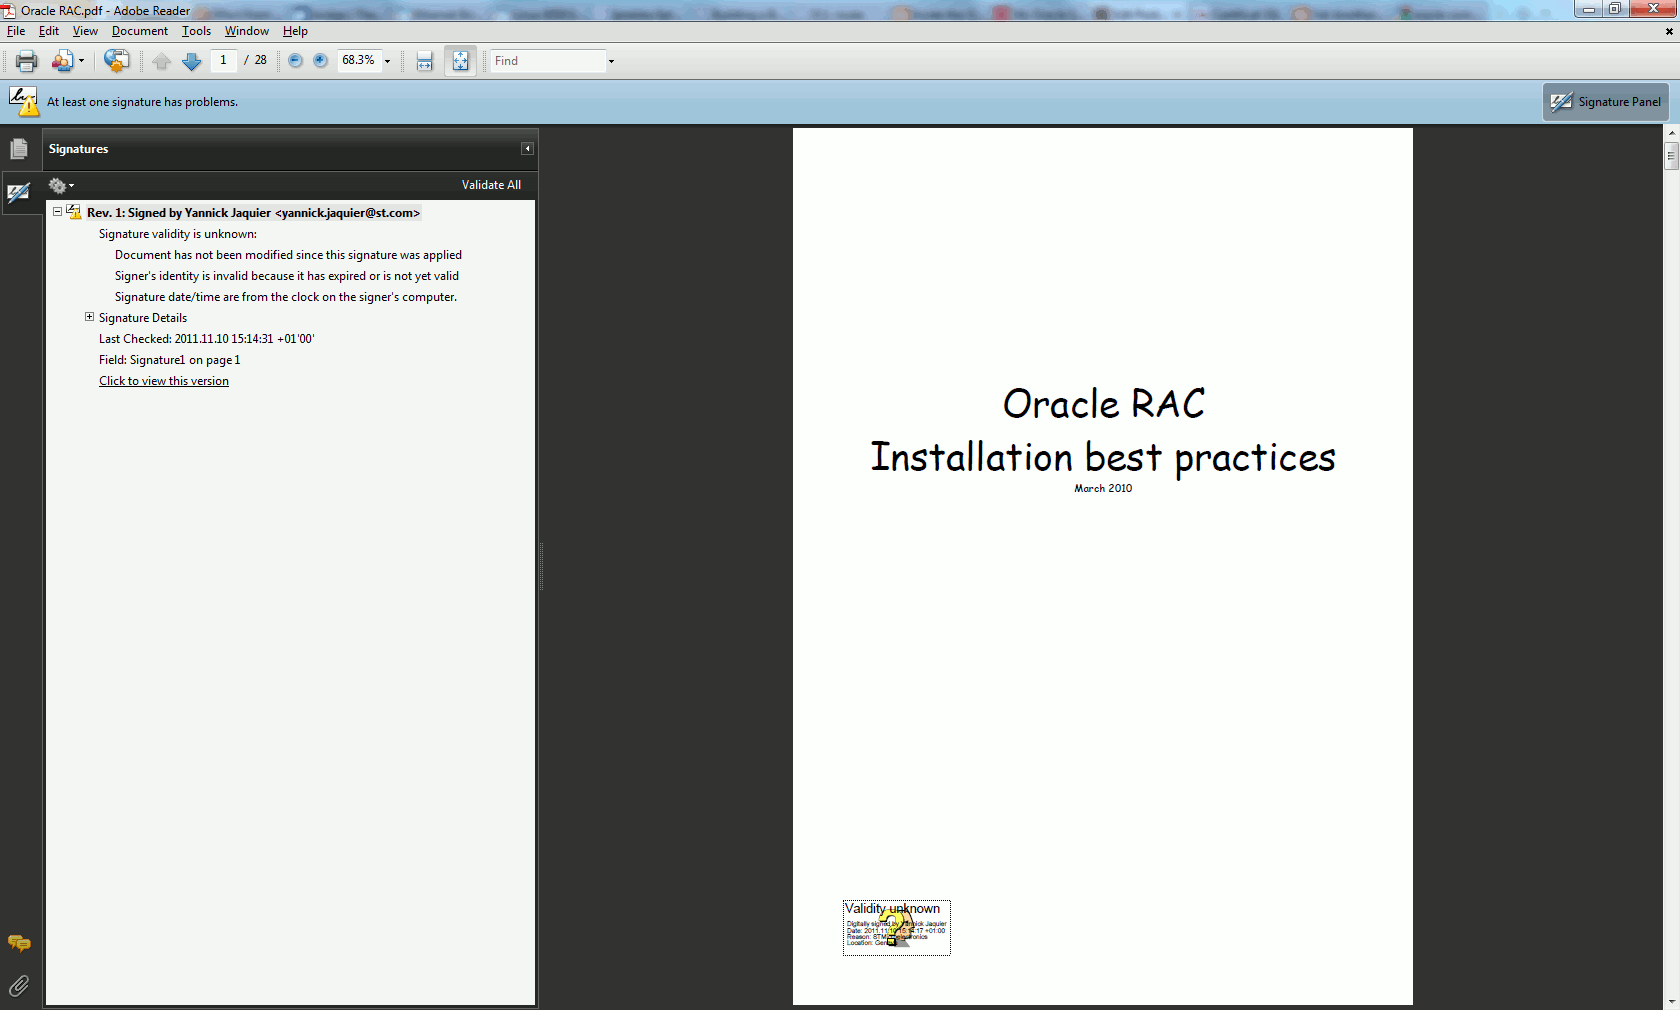
Even if I daily use Foxit Reader the Adobe Reader signature display is a bit more verbose than Foxit Reader one:


